Revit Trim Roof By Extrusion

Revit Roof By Extrusion A How To Guide Youtube

Trim Wall Top With Ref Plane Autodesk Community Revit Products

Trimming An Extruded Roof

Solved Can T Trim Parts Of Roof With Void Extrusion Autodesk Community Revit Products

Curtain Wall Detail Bing Images With Images Curtain Wall Detail Roof Detail Facade Architecture

Solved Cutting Roof Mullion Profile In Revit Autodesk Community Revit Products

We also need to use a refrence plane upopn which we can sketch the side profile for our extrusion.
Revit trim roof by extrusion. The roof by extrusion tool is used to create wave form type roofs you create a sketch of the upper profile of your roof in a side view i e. To apply sloped glazing select the roof and in the type selector select sloped glazing. Elevation of section you can select a reference plane to sketch your profile on as long as you have a named one in your model. Press tab to switch between horizontal and vertical grids.
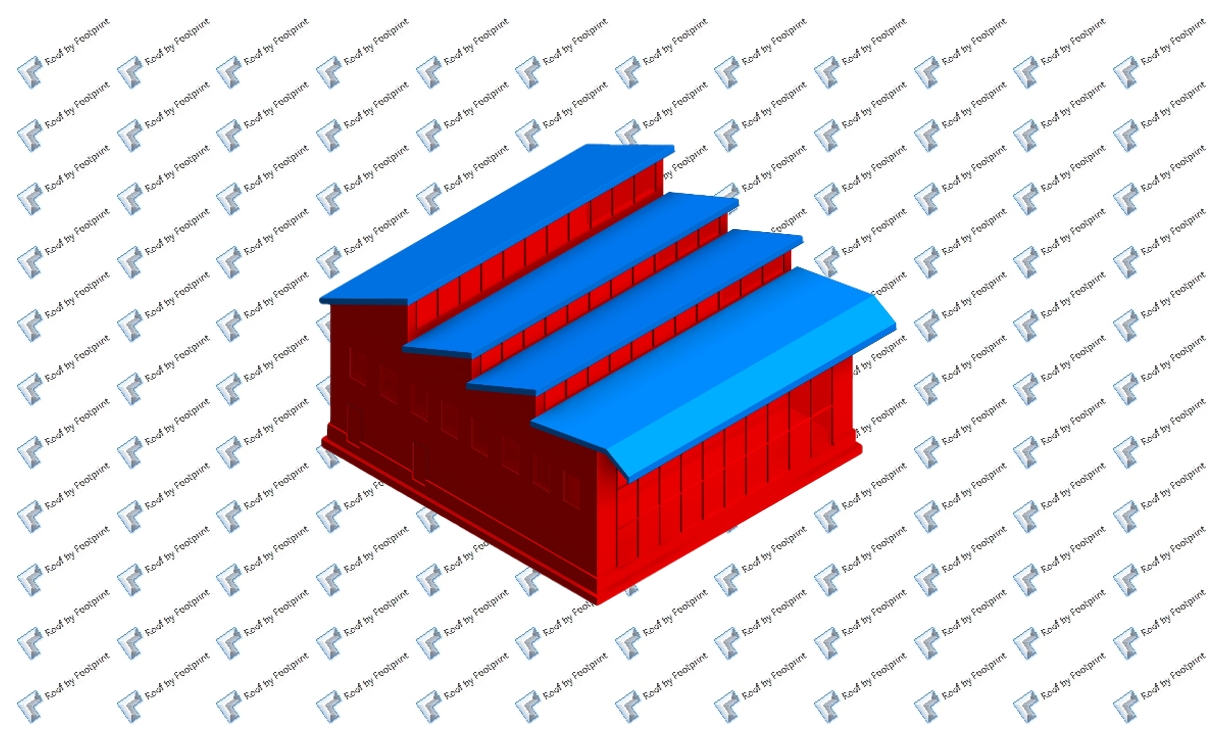
Revit completes the extrusion and returns you to the view in which you started the extrusion. So first of all let s go ahead and create our reference plan. The bad thing about extruded roofs is the fact you can t follow along with the footprint of your building the good thing is we can do something about that the objective of this video is to go to the plan view we will then create a void where our walls jag in and out this is going to allow revit to cut the roof properly in plan to get started jump into your revit roofs. To view the extrusion open a 3d view.
To resize the extrusion in the 3d view select it and use grips to edit it. After you create a roof by extrusion you can rehost the roof or edit the work plane of the roof. The steps to model a roof by extrusion in revit are as follows. To do this go to architecture tab roof dropdown roof by extrusion once you are in roof by extrusion a dialogue window will open.
First we need to navigate to the roof by extrusion tool. You can place curtain grids on the curtain panels of the sloped glazing. Click modify create extrusion tab mode panel finish edit mode.

Image Result For Aluminium Coping Fascia Trim Roof Design Roofing Aluminum Roof

San Francisco Airport Air Traffic Control Tower And Integrated Facility San Francisco Airport Air Traffic Control Facility

Fascia Profile Hack For Showing Corrugated Metal Deck In Revit Youtube Metal Deck Corrugated Metal Fascia

Solved Reasons For Void Not Cutting An Extrusion Autodesk Community Revit Products

Shed Roof Square Cut At Top Edge Please Help Autodesk Community Revit Products

Grasshopper To Revit Http Bimoutsourcing Com Grasshopper To Revit Html Con Imagenes Planimetria Planos

Revit Roof Series Part 2 Roof By Extrusion Youtube

Frame Wall With Exterior Rigid Insulation With Cavity Insulation And Brick Or Stone Veneer Applicabil Exterior Insulation Brick Veneer Interior Wall Insulation

58 Revit Tips Adaptive Curved Frame For Curved Walls Youtube Com Imagens Revit Molduras

10 Revit Tutorial Roofs Part 2 Roof By Extrusion Youtube

Chromed Brass Edge Profile For Walls Projolly Square Chromed Brass Edge Profile Progress Profiles With Images Wall Design Architecture Details Tile Trim

Z Shadow Bead Aluminum Str 050 063 1 2 W X 5 8 D X 10 Lg Prime Painted Metal Door Aluminum Extrusion Installation

Beveled Corner Bead Detail Drywall Drywall Corners Extruded Aluminum

Gallery Of Diffused Light How To Design Lantern Buildings With Self Supporting Glass Walls 22 Glass Wall Diffused Light Translucent Glass

Solved How To Change The Colour Of Generic Roof From Green To Other Autodesk Community Revit Products

Revit Roof Basics 04 Intersect By Roof Join Cadclips Youtube

How To Create A Sloped Work Plane In Revit Autodesk Community Revit Products
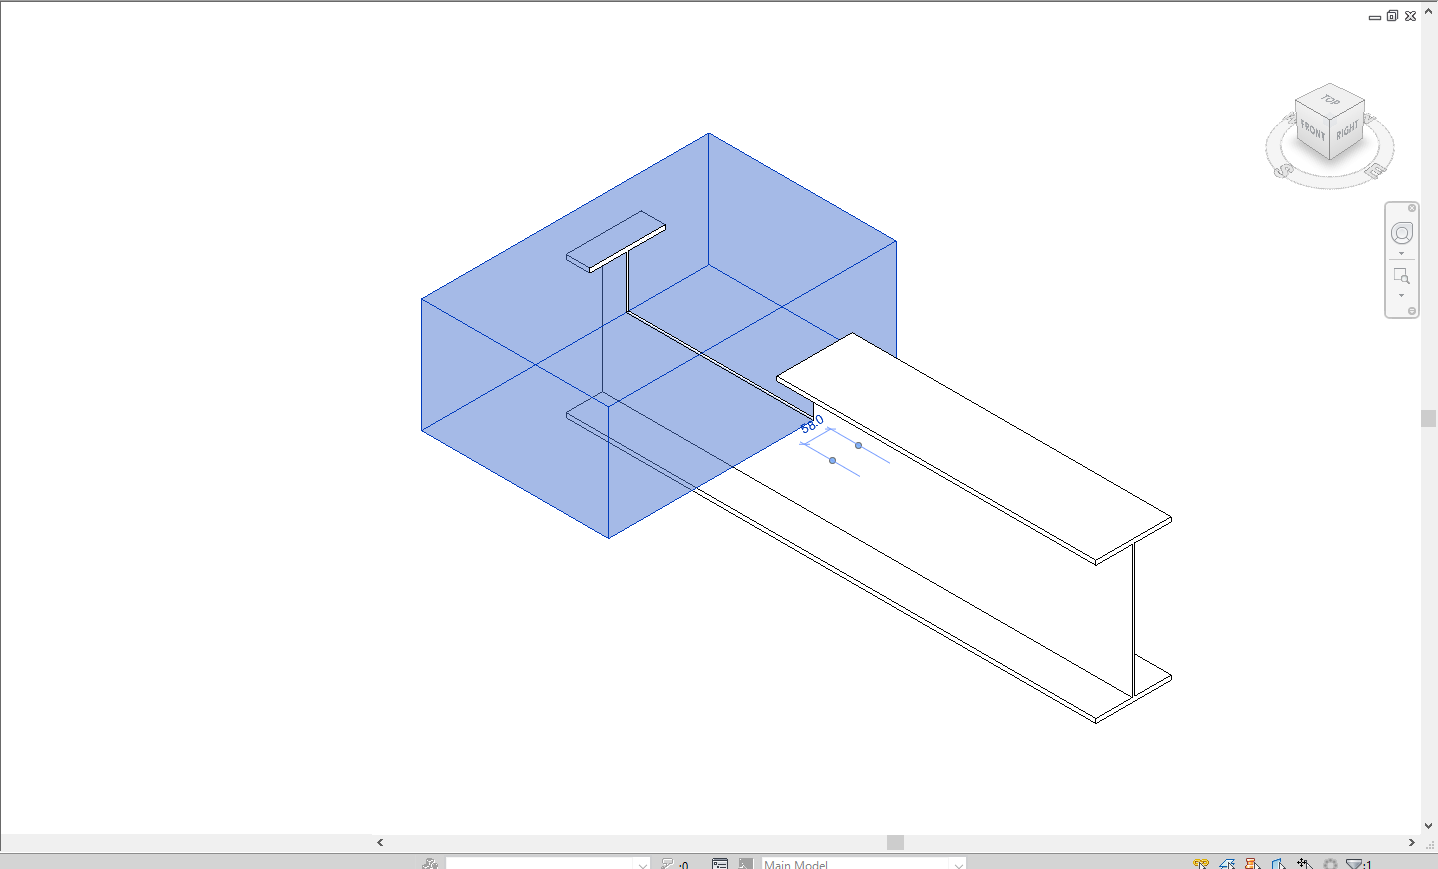
How To Cut Structural Beam With Void In Revit Revit Products 2019 Autodesk Knowledge Network
Https Encrypted Tbn0 Gstatic Com Images Q Tbn 3aand9gcslgimm18nz5xb 2rwkqmhslb Iy1nsi1iobhqcz3ylzzknlyws Usqp Cau
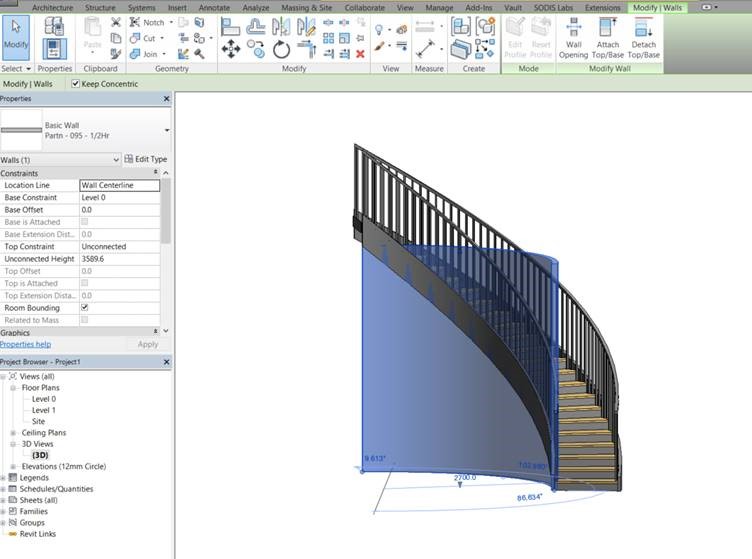
Trimming Walls To The Underside Of Curved Stairs Using Voids In Revit 2019 Cadline Community
Common Types Of Roofs How To Model Them In Autodesk Revit Agacad

Trim House By Apollo Architects And Associates Architect Architecture Japan Architecture

Structural Glass Handrail And Balustrading Solutions Detali Arhitektury Nastil Kryshi Arhitektura

Revit Architectural Project 18 Parapet Wall Inplace Sweep Youtube

Revit Sloped Glazing Youtube

Architecture Design Handbook Architectural Details Wall Cladding Curtain Wall Systems Glass Curtain Wall Wall Cladding Architecture Details

Important Things To Keep In Mind When It Comes To Your Roof Interior Architecture Design Roofing Architectural Materials

Roof Shapes Useful For Different Rock Shapes Http Www Roofing Contractor Doncaster Lbiss Co Uk Images Different Typ Roof Shapes Building Roof Roof Styles

Revit Roof By Face A How To Guide Youtube

Rutland Architectural Blog Rain Gutter Styles Guttering Profiles Types Metal Roof Box Gutter Gutters

Gallery Of Xiqu Centre Revery Architecture Rlp 24 Architecture Facade Engineering Entrance Design
Aluminium Y Section Tile Trim Like By Atelierdia Diaism Acquire Understanding Tjann Mohd Hatta Ismail Tiling Tools Tile Trim Joinery Details

Revit Cut Geometry Tool Youtube

Changing The Color Of Material Appearance In Revit Youtube

Interior Drop Soffits Hospital Interior Interior Build Blog

Revit Roof Cleaning Up Overlapping Roofs Youtube

Aluminium Composite Panels For Signage From Ullrich Aluminium Paneling Aluminum Extrusion Extrusion

Revit Splitface And Paint Command A How To Guide Youtube

Gallery Of 40 Impressive Details Using Concrete 29 Concrete Facade Construction Details Architecture Concrete Building

Solved Problem In Model In Place Void Geometry Autodesk Community Revit Products

How To Use Face Based Voids To Cut Your Revit Elements Agacad

Copings Jpg 625 725 Coping Stone Detailed Drawings Single Storey Extension

