Revit Join Gutter
Revitcity Com Connecting Gutters

Revitcity Com Annoying Gutter Join

Gutters With Slope Autodesk Community

Gutter End Caps In Revit Architecture Youtube
Solved Model Roof Gutter Autodesk Community Revit Products

Autodesk Revit Tutorials 13 Adding An Entry Deck Revit Tutorial Autodesk Revit Tutorial

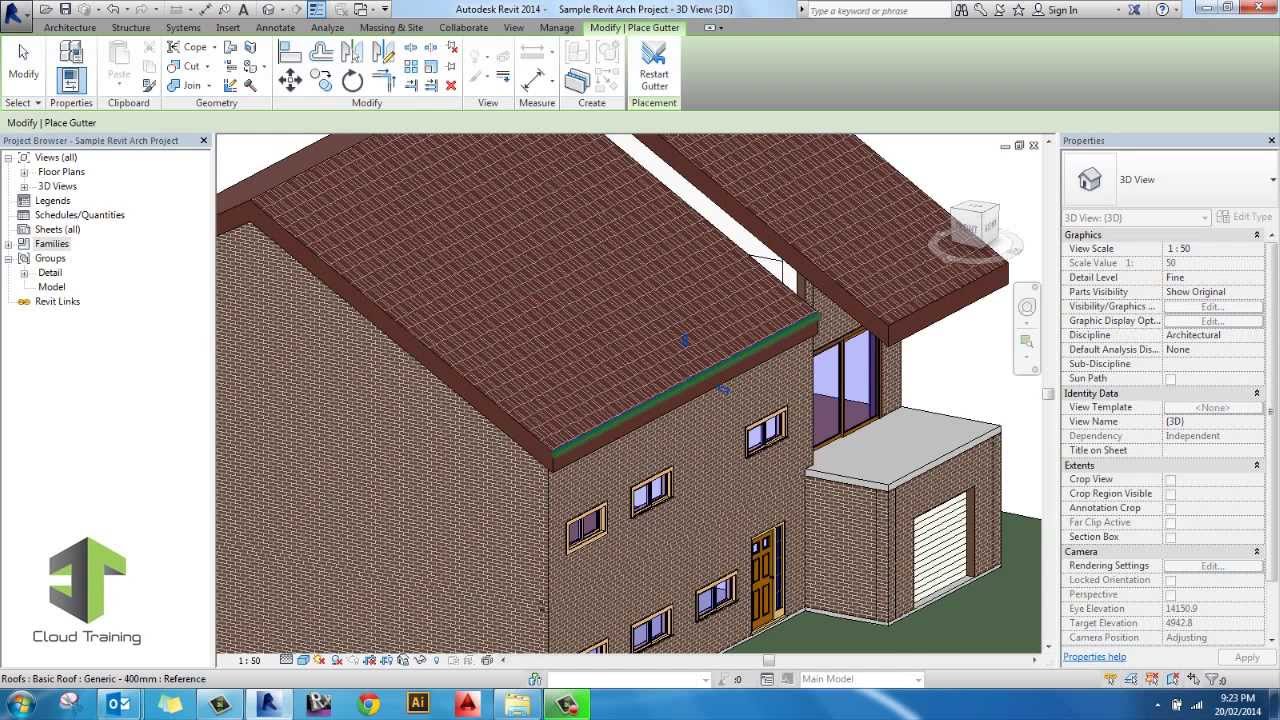
Use the gutter tool to add gutters to roofs soffits model lines and fascia.
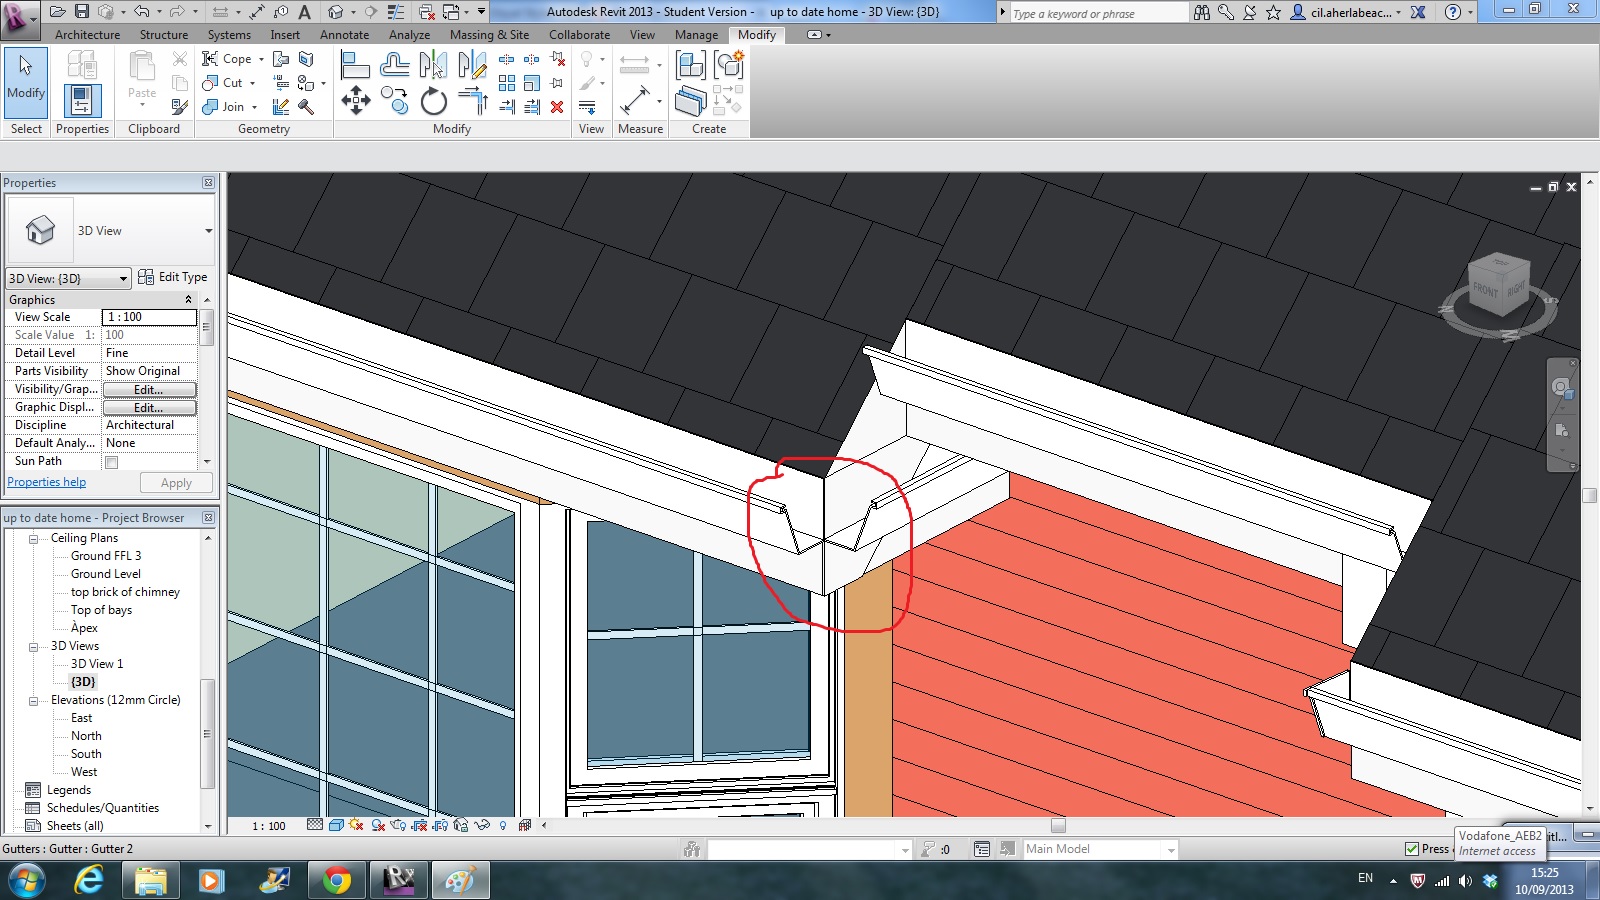
Revit join gutter. Click modify place gutter tab placement panel restart gutter to finish the current gutter and start a different gutter. How to add gutters and downspouts to a model in revit you can place gutter elements on horizontal roof eaves and gables. You can create and load your own custom profiles to use as gutters. Pvc or vinyl gutters are designed to snap together easily but may require the use of gaskets or a sealant to ensure a waterproof connection.
Click architecture tabbuild panelroof drop down roof. As shown in the following illustrations the tool removes the visible edge between the joined elements. Highlight horizontal edges of roofs soffits fascias or model lines and click to place the gutter. You can also use the tool to join hosts and in place families or hosts and project families.
You can manage the location and appearance of gutters after they have been placed. Click modify place. How to create end caps to open ended gutters in revit architecture 2011 presented by thomas truong. As you click edges revit treats this as one continuous gutter.
Use the join geometry tool to create clean joins between 2 or more host elements that share a common face such as walls and floors. Gutters are swept profiles. Check the blue handles at the ends of the gutters and make sure they re both at the same location for each gutter piece. The joined elements then share the same line weight and fill.
Highlight horizontal edges of roofs soffits fascias or model lines and click to place the gutter. Watch the status bar for information about valid references. Joining gutter sections together is a fairly simple job. As you click edges revit treats this as one continuous gutter.
Now if you re choosing a fascia sweep as the edge to host your gutters and the fascias don t exactly trim together at a corner then the gutter won t either and you ll have to manually pull the ends of the gutter together to miter the corners.

Revit Tips Spanish Roof Adaptive Insane Version With Images Revit Tutorial Roof Revit Architecture

Autodesk Revit Tips And Tricks From Rhino To Revit Autodesk Revit Learn Revit Education Design Interior

Pin On Roofing

Energy Efficient Revit Construction Details Energy Efficient Construction Detailed Drawings Architecture Details

Revit Family Academy Generic Model Line Based Revit Family Autodesk Revit Generic

Roof Flat Roof Revit Tutorial Architecture Program Roof Design

Autodesk Revit Architecture 2014 Tutorial Basic Wall Revit Architecture Autodesk Revit Revit Tutorial

Profile Families For Fascias In Autodesk Revit Youtube
Revit Families Series Custom Gutter Profile A How To Guide Youtube

Creating Pattern In Revit Patrones

Topography Kite Tutorials Is Educational Channel In Urdu Language Revit Architecture Revit Tutorial Architecture

Dryseal Grp Through Wall Hopper Roof Installation Fibreglass Flat Roof Flat Roof

Revit 2d Details Part 1 Introduction

Schedules Basics Tips Building Information Modeling Revit Tutorial Basic

Smart Flat Roofs The Craft Of Parapet Detailing Build Blog Flat Roof Membrane Roof Parapet

How The Soffit Fascia Should Be Google Search Image Framing Construction Home Construction Home Maintenance
Video Create A Dormer Revit Products 2019 Autodesk Knowledge Network

Renzo Piano Kimbell Art Museum Floor Plan Ando Architecture Tadao Pinned By Www Modlar Com Construcao Construcao Civil
Https Encrypted Tbn0 Gstatic Com Images Q Tbn 3aand9gcqor2isbxwlbhwpl3uftobkksbmzfomx Aabdptf0 9yvkdig2p Usqp Cau

Bim After Dark Ultimate Gallery Therevitkid Com Tutorials Tips Products And Information On All Things Rev Bim Revit Architecture Architectural Thesis

Zintek Gutter Detail Flat Roof Design Zinc Roof Roof Design

In This Revit Video Tutorial One Can Learn How To Use Revit Architecture 2018 To Generate Stair Through B Revit Architecture Architecture Program Architecture

Revit 2018 Soffit And Fascia Tutorial Youtube
Revit Tutorials Custom Wall Parapet Youtube

Revit Architectural Project 19 Roof Fascia And Profile Youtube

Revit For Interior Design Class Final Rendering Composition Interior Design Classes Best Interior Design Websites Interior Design Programs

Steel Construction Detailing Specialized In Bim Engineering Services Is Essent Building Information Modeling Architecture Presentation Architecture Model
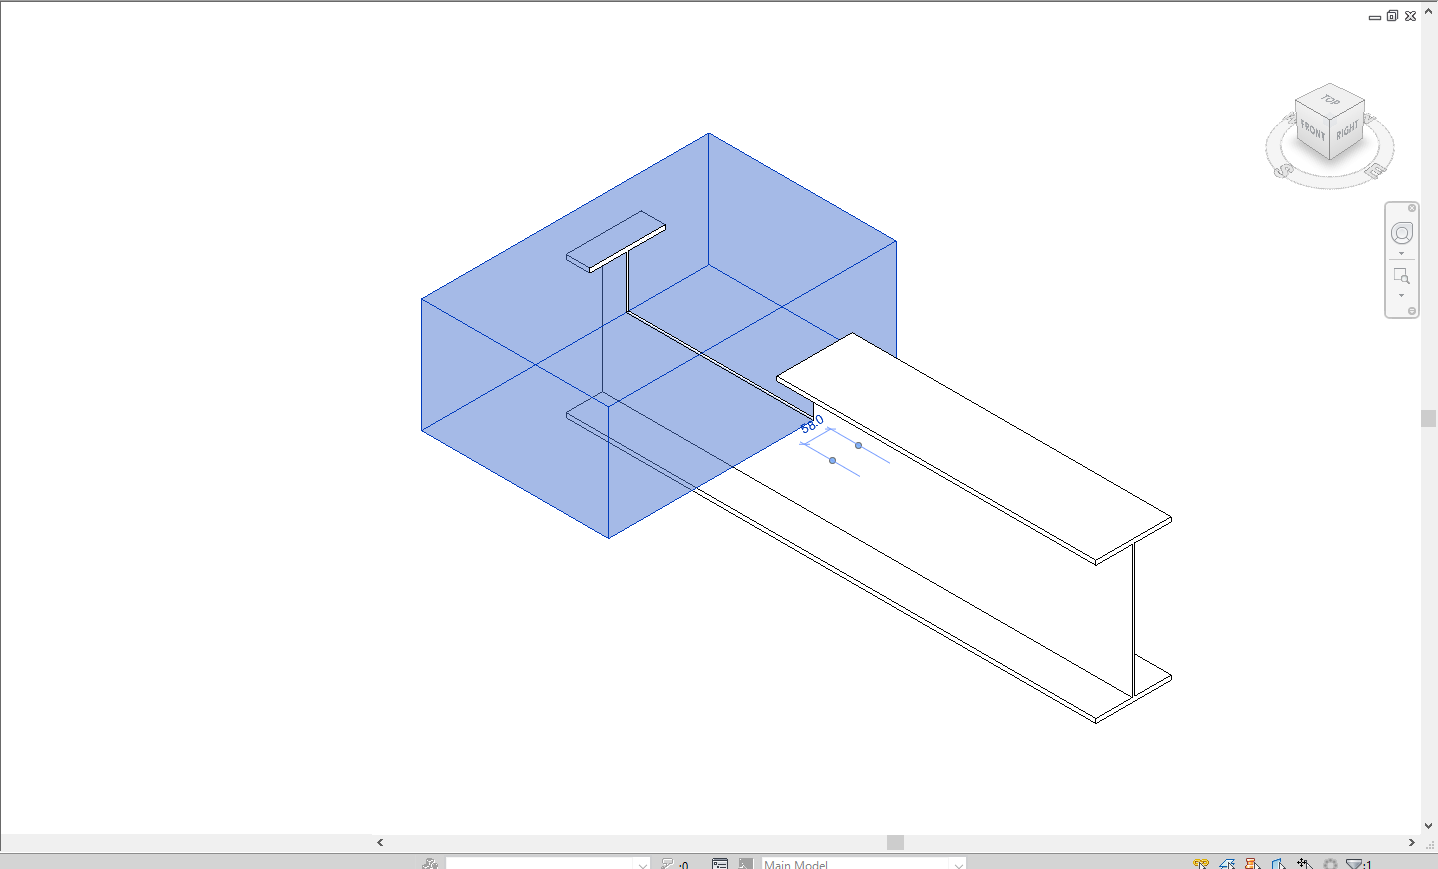
How To Cut Structural Beam With Void In Revit Revit Products 2019 Autodesk Knowledge Network

How To Add Roof Ridge Tile In Revit Youtube

Revit Chimneys Youtube

Revit Roof Basics 10 Slope Arrow Cadclips Youtube

Revit Families For Architecture Gymnasium Revit Family Revit Architecture Architecture

Solved Cannot Change Elevation Or Offset Of Mechanical Equipment Autodesk Community Revit Products
Interior Gutter And Wooden Roof

Curtain Wall Corner Mullions Curtain Wall Building Information Modeling Revit Tutorial

Revit Roof Finishing Adding Soffit Fascia Gutter Youtube
Create Streets Sidewalks And Curbs Revit Products 2017 Autodesk Knowledge Network

Revit Void Forms Youtube

Here Is An Example Of A Cross Gable Roof In Picture Form Gable Roof Design Fibreglass Roof Gable Roof

Revit Wall Closers Create Layer Wrapping At Wall Inserts Ends Youtube

Revit Component Stairs Tips And Tricks Cadtechseminars Com Revit Components Autodesk Revit Tips

Roof Insulation Market Information By Type Batts Rolls Rigid Insulation Reflective Systems And Landscape Design Software Website Design Free Stock Photos

