Revit Extending Walls To Roof

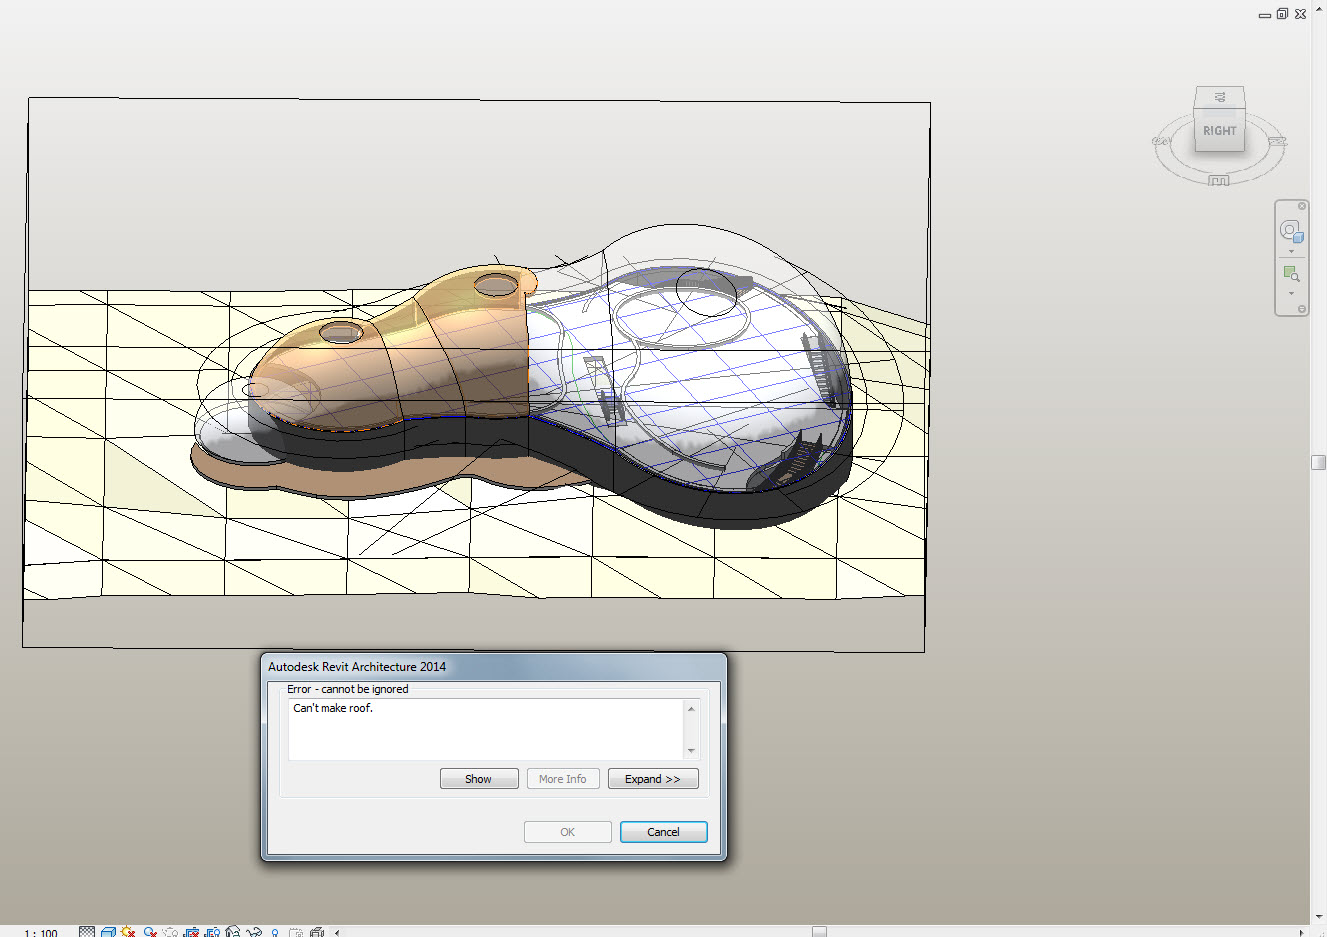
Cannot Join Walls To Roof In A Proper Way Autodesk Community Revit Products

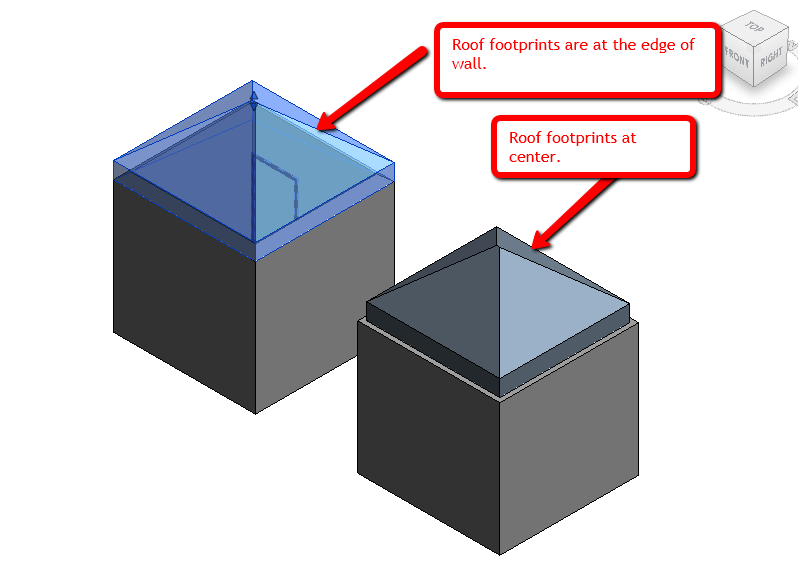
Roof Boundary Definition And Construction Settings In Revit Models Agacad
Revitcity Com Wall To Roof Join Issue
Revitcity Com Difficulty With Wall And Roof Ends

Slop Bottom Of Wall Autodesk Community Revit Products

Split Gable Roof Autodesk Community Revit Products

Press ctrl and click to select each interior wall that displays in the underlay of the entry level.
Revit extending walls to roof. This is a general. Revit made easier with axiom s easy to use tools. By attaching a wall to another element you avoid the need to manually edit the wall profile when the design changes. You can join a roof to the top face of another roof and the wall below that roof if you select the wall as the target.
After converting mass faces to a roof you can use shape handles to extend the roof boundaries. Click to select the roof. On the quick access toolbar click default 3d view. You can join roofs to other roofs or walls or unjoin them if they were previously joined.
Notice that the walls extend to the roof. By default when you pick a compound wall with multiple layers the floor sketch will extend to the core boundary of the wall. In the drawing area select the roof face. If desired you can specify an offset using a positive or negative value.
Yes it was that easy. You cannot join a roof to more than one top face of another roof. The other element can be a floor a roof a ceiling a reference plane or another wall that is directly above or below. Shape handles are available for all non horizontal side surfaces.
Revit video tip of the day. The wall must be attached to the target roof and the target roof must be a footprint roof. After placing a wall you can override its initial top and base constraints by attaching its top or base to another element in the same vertical plane. When you select the roof face roof shape handles display.
Click modify walls tab modify wall panel attach top base.

Wall Roof Joint Autodesk Community Revit Products

Solved Walls Not Attaching To Roof Created By Selecting Faces Of Mass Autodesk Community Revit Products

Solved Why Do Roofs Cut Walls When Joined Autodesk Community Revit Products

Revit Architecture Roof By Footprint Bimscape

Solved How To Adjust Top Extension Distance For Wall That Is Aligned With Roof Ref Pl Autodesk Community Revit Products
Revitcity Com Roof Wall Core Problem

Solved Recessed Roof Extending Into Wall Autodesk Community Revit Products

Solved Walls Not Attaching To Curved Roof Autodesk Community Revit Products
Video Create A Dormer Revit Products 2019 Autodesk Knowledge Network
9 Tips To Understand Revit Roofs Revit Pure

Exporting Ifc From Revit Walls Don T Attach To Roof Autodesk Community Revit Products

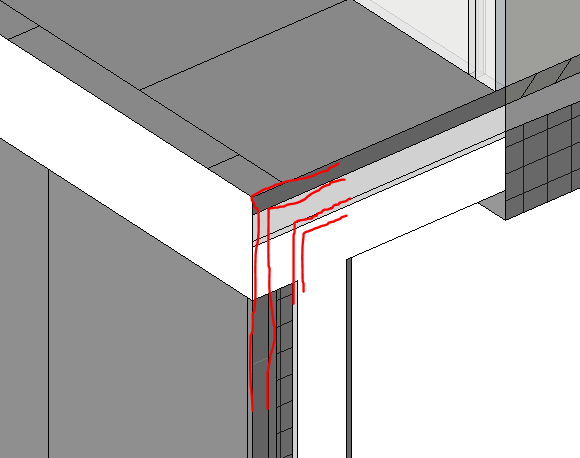
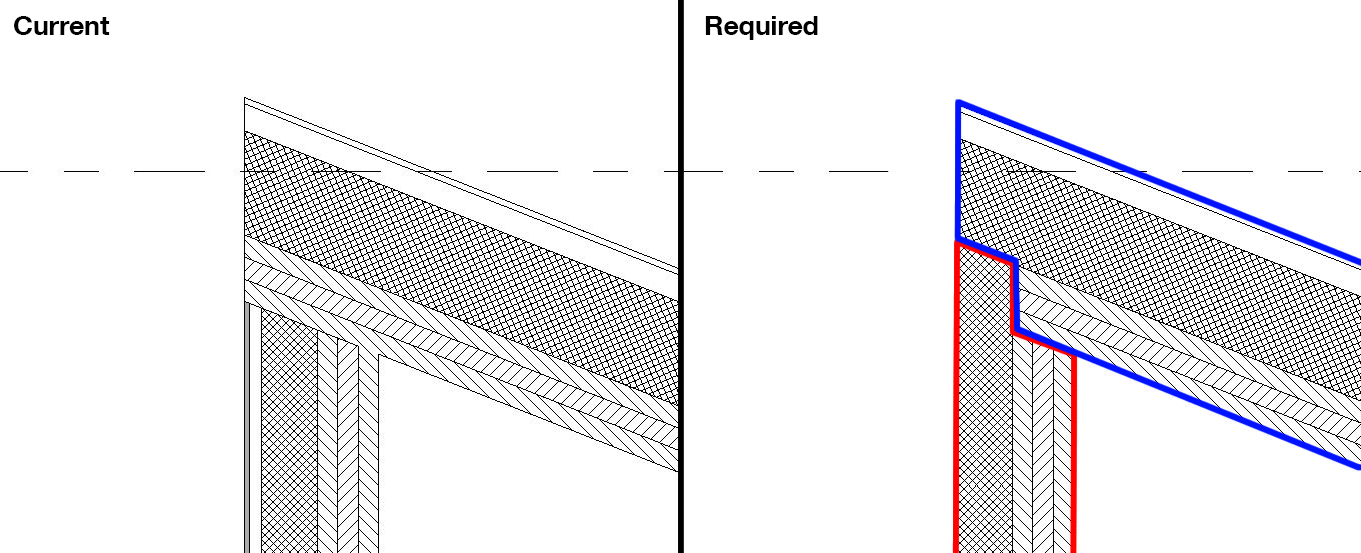
Eave Detail Continuous Insulation Finish Autodesk Community Revit Products

Solved Attaching Wall To A Roof Problem Autodesk Community Revit Products

Window Family Void Not Cutting Joined Wall Autodesk Community Revit Products

Revit Roof Basics 04 Intersect By Roof Join Cadclips Youtube

Solved Roofs Page 2 Autodesk Community Revit Products

Solved Cannot Extend Layer S Of The Highlighted Vertically Compound Wall Autodesk Community Revit Products

Attach Top Base Can T Keep Wall And Roof Joined Autodesk Community Revit Products

Solved Roof Overhang Option Not Available For Some Roofs Autodesk Community Revit Products

Walls Are Not Visible In Floor Plan Autodesk Community Revit Products

Solved How To Do A Double Gable End In Revit Autodesk Community Revit Products

Solved Compound Wall Core Extending Into Roof Structure Autodesk Community Revit Products

Adding Roof Edge Dormers Revit Tutorial Lynda Com Youtube

3 Complex Roof Shapes In Revit Youtube

Magnet Collage Remodeling In Autodesk Revit Using Families Topcon Positioning Systems Inc

Part 5 Create A Roof Revit Products 2020 Autodesk Knowledge Network

Engineer Civil Revit Jeffery J Jensen Wiki
Revitcity Com Roof By Face And Wall By Face Tools

Overhangs And Wall Thicknesses In Revit Best Cad Tips

Roof Diseno De Teja Courtain Wall Part 2 Roof Tiles Roofing Roof

Aga Cad Blog Sharing Bim Practice Agacad
Flat Roofs In Revit Tutorial Youtube

Slab And Foundation Lines Showing On External Walls Autodesk Community Revit Products

Solved Extruding A Roof In Revit To Drop Below The Main Roof Line Autodesk Community Revit Products

Attach Wall Base To Sloping Roof Top

Revitcity Com Wall Sweeps Not Trimming To Gable Roof

Youtube Wood Framing Walls Extensions Home Design Software Picture Frame Designs Timber Frame Construction

Revitup Gambrel Roofs In Revit

Trellis Modelling With Glazing Roof Option Trellis Autodesk Revit Autodesk

Category Jeanomar Scully 214 095 933 Src221
Https Portal Imaginit Com Portals 0 Whitepapers Imaginit New Wp Revitroofs Pdf
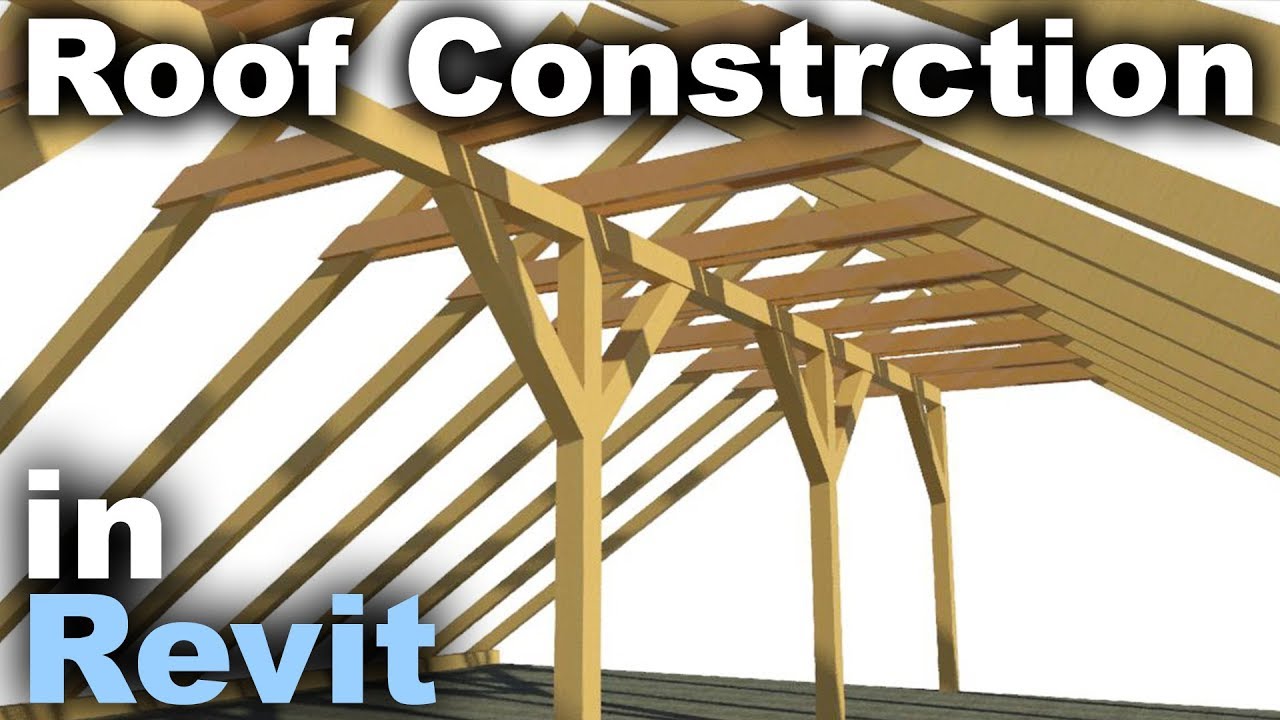
Traditional Roof Construction N Revit Tutorial Youtube
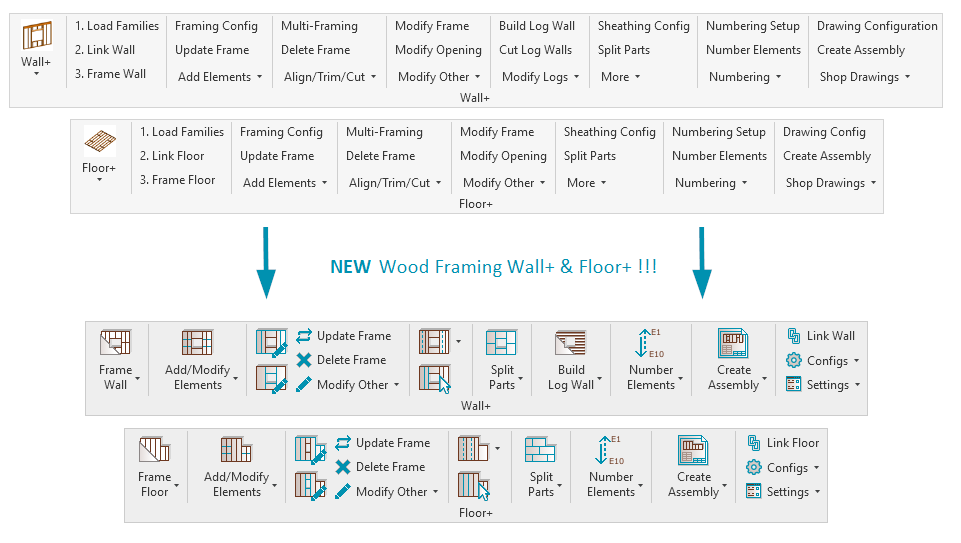
New Ui Released For Wood Metal Framing Wall Floor Roof Ui Up Next Agacad

