Revit Extend Wall Up To Roof Deck

Solved Single Wall Attach To Two Roofs Autodesk Community Revit Products

Cannot Join Walls To Roof In A Proper Way Autodesk Community Revit Products

Solved Roof Wall Join One Side Roof Misses Autodesk Community Revit Products

Solved How To Adjust Top Extension Distance For Wall That Is Aligned With Roof Ref Pl Autodesk Community Revit Products

Attach Top Base Can T Keep Wall And Roof Joined Autodesk Community Revit Products

Slop Bottom Of Wall Autodesk Community Revit Products

Revit introductory tutorial showing modelling of a basic house.
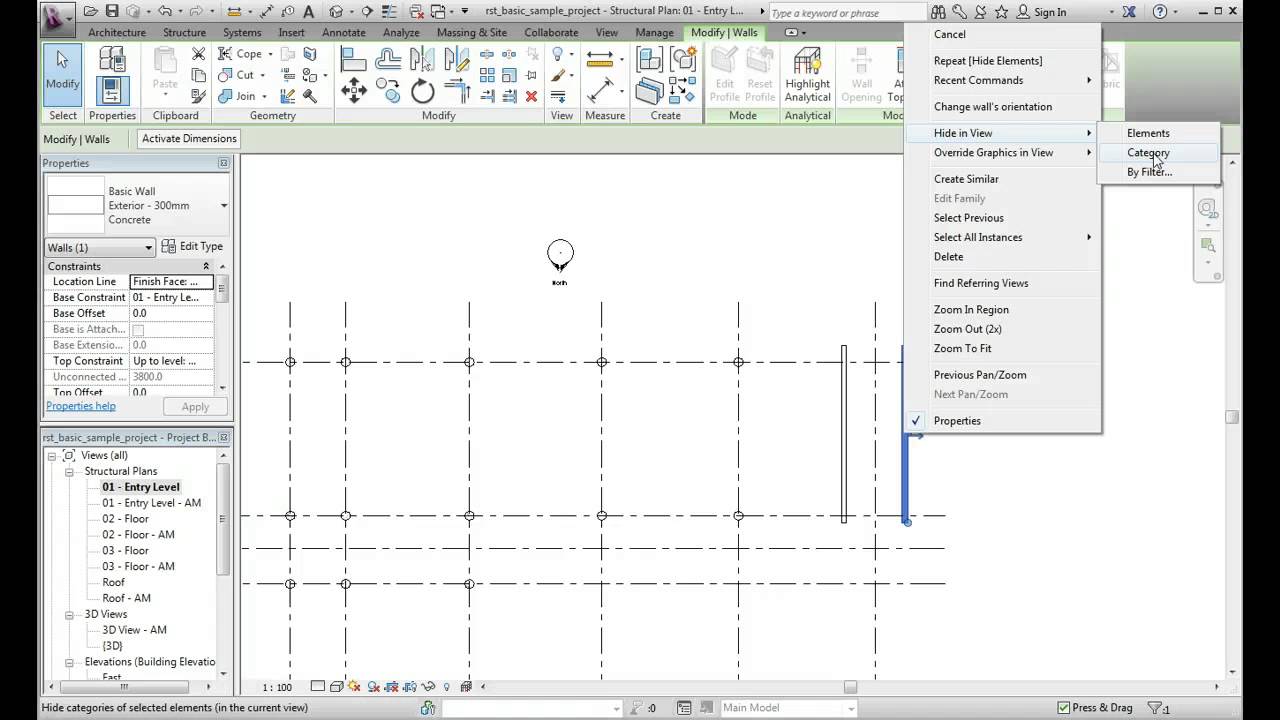
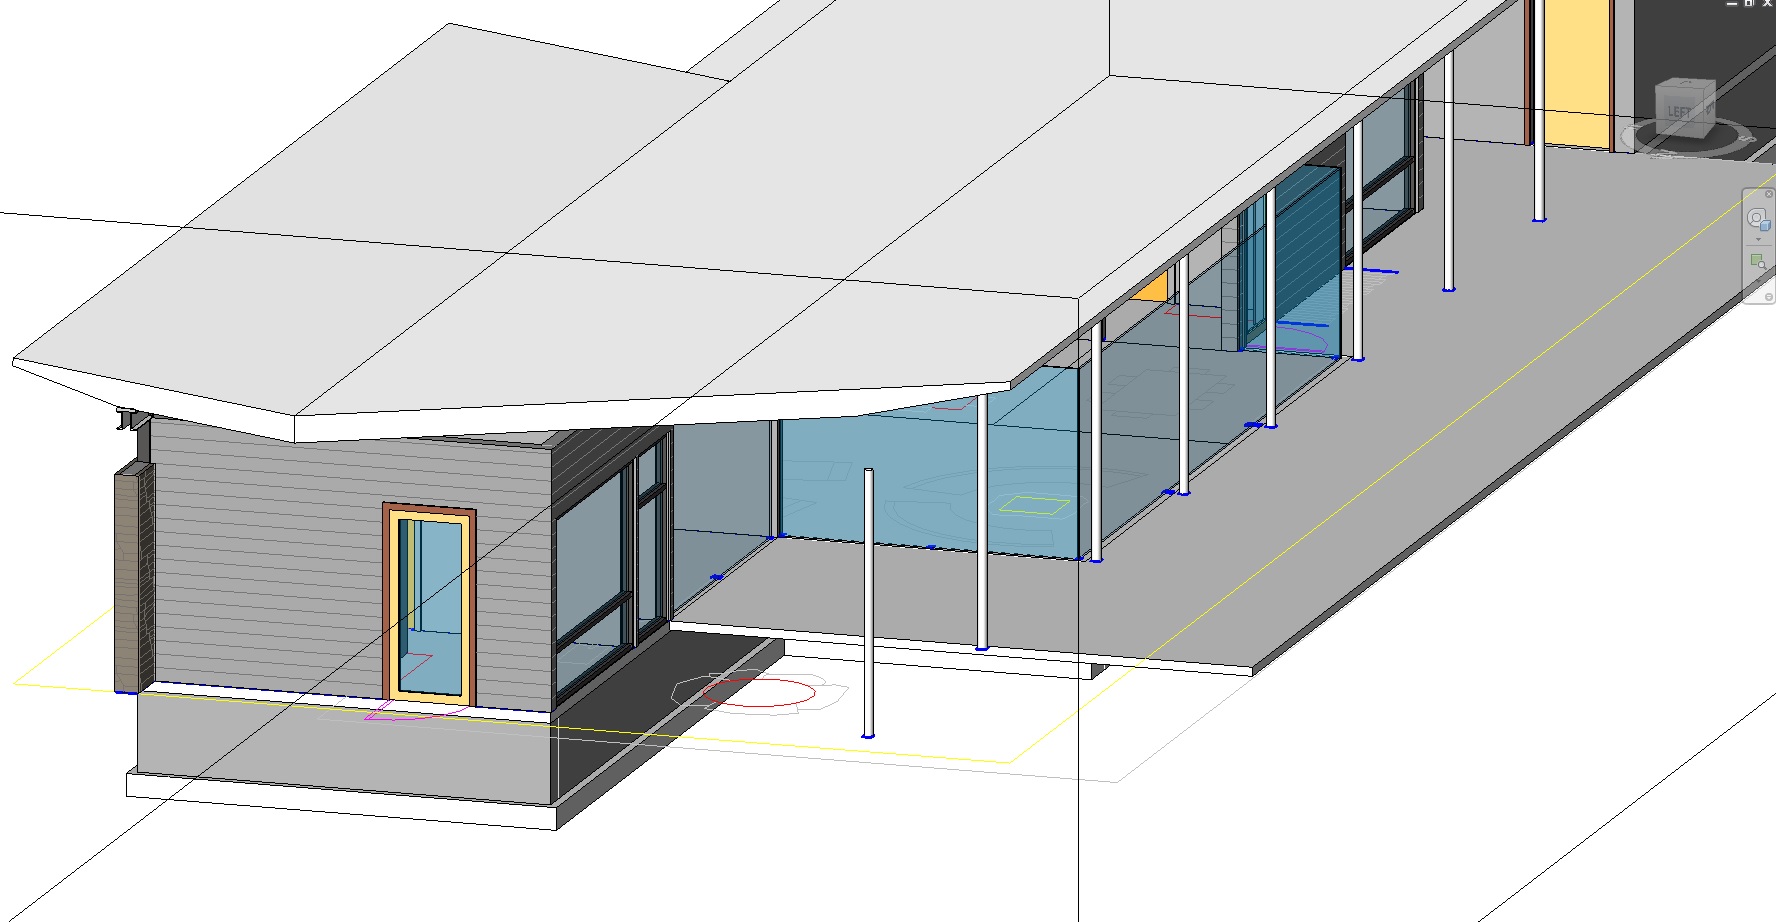
Revit extend wall up to roof deck. The other element can be a floor a roof a ceiling a reference plane or another wall that is directly above or below. Trim and extend elements you can use these tools with. After placing a wall you can override its initial top and base constraints by attaching its top or base to another element in the same vertical plane. So it is like a seo but additionally the height of the wall changes as needed.
You have a profiled roof deck. It will be exactly as high as needed to be cut by the roof so if you elevate the roof you do not need to adjust the height of the wall to be high enough. Attach to roof in revit means that basically the wall derives its height from the roof. When you select an element to be trimmed the cursor position indicates the part of the element to retain.
This video demonstrates how r. Possible problems could and probably will arise if the total roof width isn t a multiple of the roof sheet width. It is a nice feature. This is a profile that you have to draw up yourself or use a manufacturer s one.
Took a bit of jiggery pokery to do but looks lovely now. In this video i show you how to attach the walls in revit to the roof above them. By attaching a wall to another element you avoid the need to manually edit the wall profile when the design changes. How to create a patio or deck in revit architecture this video was intended for educational use at lakeville south high school.
Use the trim and extend tools to trim or extend one or more elements to a boundary defined by the same element type.

Wall Roof Joint Autodesk Community Revit Products
Revitcity Com Difficulty With Wall And Roof Ends

Solved Attach Curtain Wall To Roof Autodesk Community Revit Products

Solved Autodesk Revit 2020 Constraints Properties Issue On Wall And Level Autodesk Community Revit Products

Solved Attached Wall To Roof Problem Autodesk Community Revit Products
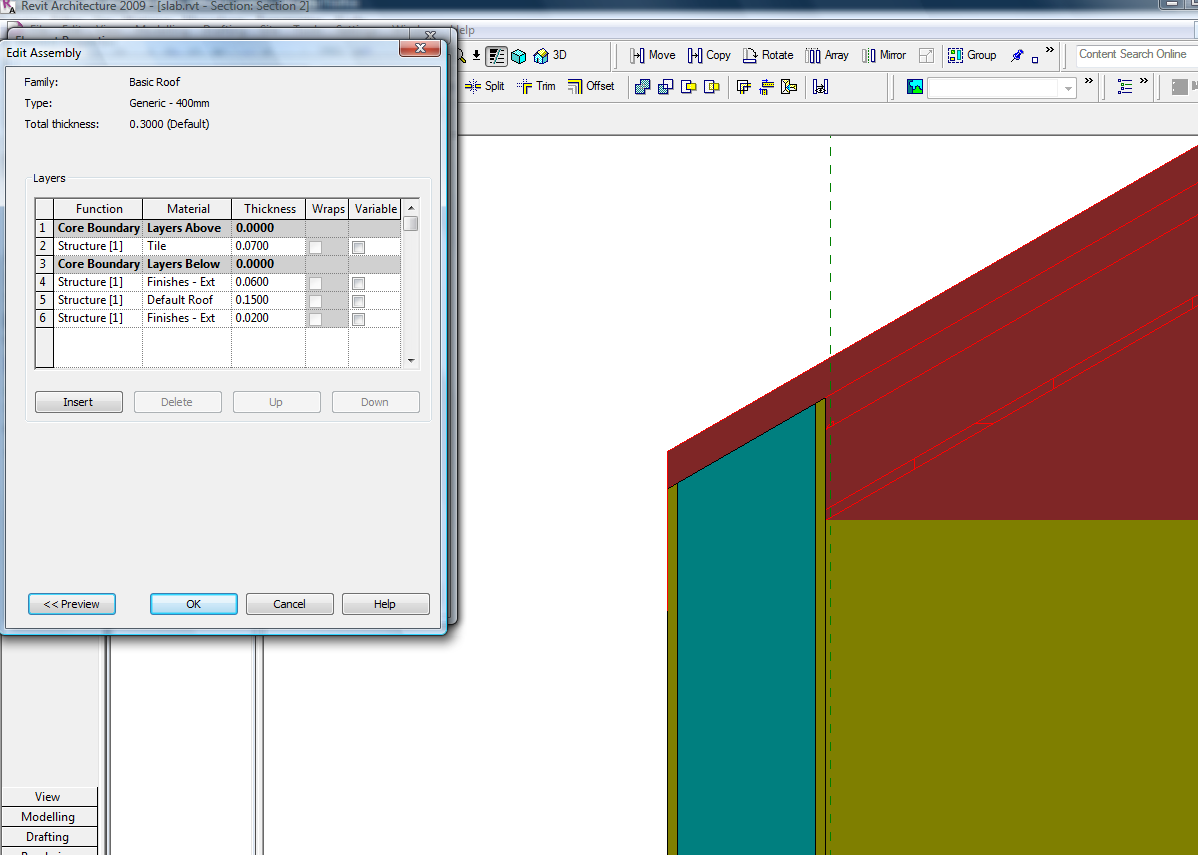
Modify Compound Walls Revit Products 2016 Autodesk Knowledge Network

Attach Wall To Multiple Roofs Autodesk Community Revit Products
Https Portal Imaginit Com Portals 0 Whitepapers Imaginit New Wp Revitroofs Pdf

Solved How To Create A Parapet In Revit Autodesk Community Revit Products
Revitcity Com Roof Wall Join Cut Roof

Revit Tutorials Roofs Youtube

Window Family Void Not Cutting Joined Wall Autodesk Community Revit Products

Revit Architecture How To Add Curtain Walls Lynda Com Tutorial Youtube

Exporting Ifc From Revit Walls Don T Attach To Roof Autodesk Community Revit Products

Attach Wall Base To Sloping Roof Top

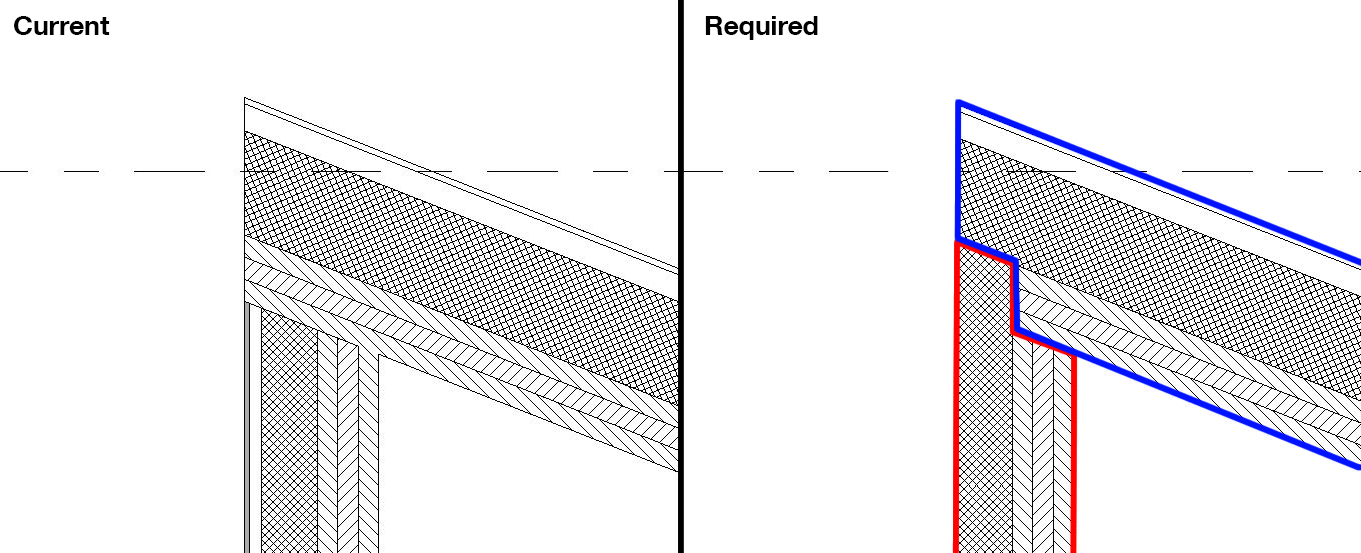
Roof Boundary Definition And Construction Settings In Revit Models Agacad

Solved Exterior Clerestory Wall Cathedral Ceiling Autodesk Community Revit Products

Revit Architecture Roof By Footprint Bimscape Roofing Fibreglass Roof Roof Design
Https Encrypted Tbn0 Gstatic Com Images Q Tbn 3aand9gcqt Jag1pa Hofhz 59fqg8i0feamtfelr0xlmsrdq6chiqvxbg Usqp Cau
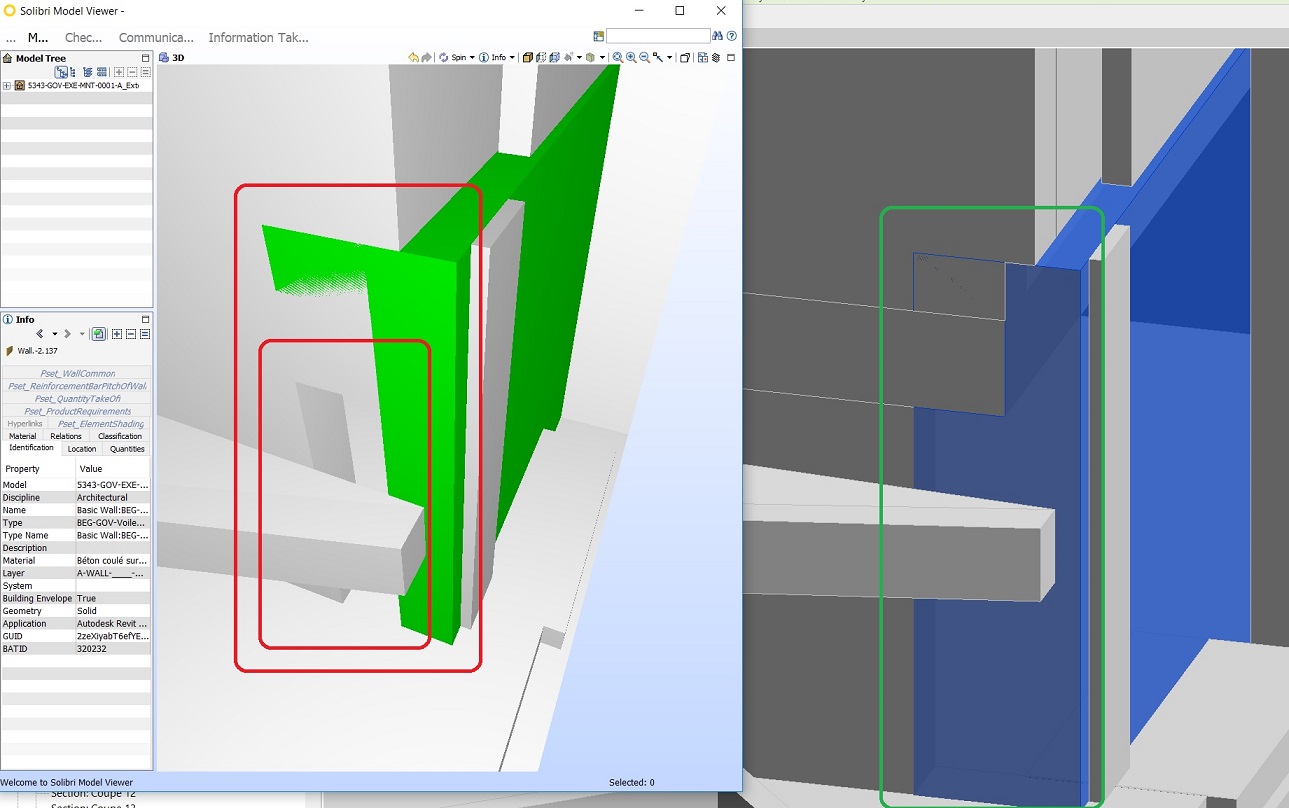
Shape Of Walls In Ifc Is Not The Same Like In Revit Revit Products 2018 Autodesk Knowledge Network

Revit Extensions Modeling Wood Framing Walls A How To Guide Youtube

Corrugated Roof And Wall In Revit A How To Guide Youtube

Solved How To Show Some Walls With Dashed Lines On A Plan View Autodesk Community Revit Products

Overhangs And Wall Thicknesses In Revit Best Cad Tips

Solved Walls Not Attaching To Curved Roof Autodesk Community Revit Products
Revitcity Com How To Attach Top Base Walls To Mass Roof

Revit Roof Basics 04 Intersect By Roof Join Cadclips Youtube
How Should I Trim Top Of Wall To Fit To Undulating Roof
Solved Attaching Wall To A Roof Problem Autodesk Community Revit Products

Energy Efficient Revit Construction Details Energy Efficient Construction Detailed Drawings Architecture Details

Solved Custom Curved Curtain Wall Sweep Join Problem Autodesk Community Revit Products

Flat Roofs In Revit Tutorial Youtube

Solved Joining Vaulted Ceiling Component To Walls Autodesk Community Revit Products

Magnet Collage Remodeling In Autodesk Revit Using Families Topcon Positioning Systems Inc
Attach Walls To Other Elements Revit Products 2016 Autodesk Knowledge Network

Autodesk Revit Tutorials 13 Adding An Entry Deck Revit Tutorial Autodesk Revit Deck

Increase The Reliability Of Your Revit Model With Better Modeling Habits By Autodesk University Autodesk University Medium

Stop Asking To Attach Walls Autodesk Community

Modify The Vertical Structure Of Walls Youtube

Revitcity Com Wall Sweeps Not Trimming To Gable Roof
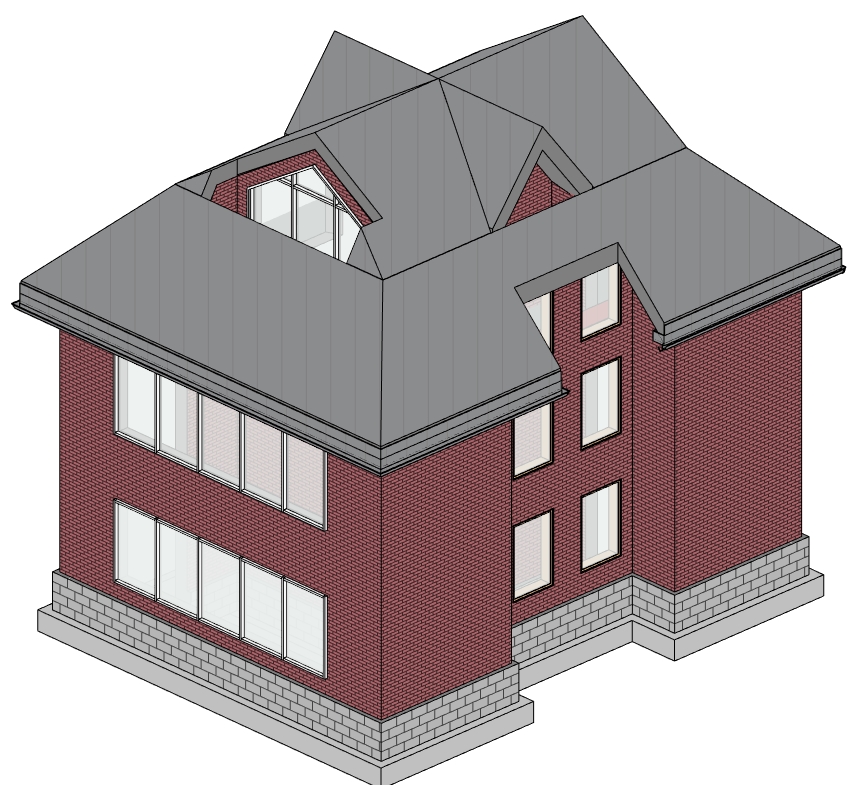
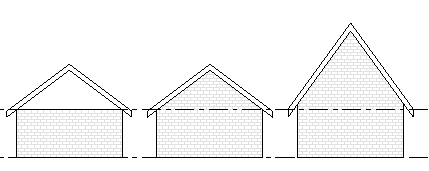
Common Types Of Roofs How To Model Them In Autodesk Revit Agacad

Autodesk Revit Tutorials 11 Attaching Walls To The Roof Autodesk Revit Revit Tutorial Revit Architecture