Revit Cut Extruded Roof
How To Cut A Hole To A Roof Revit Lt 2018 Autodesk Knowledge Network

Solved Cutting Roof Mullion Profile In Revit Autodesk Community Revit Products
Create A Dormer Opening In A Roof Revit Products 2018 Autodesk Knowledge Network

Revit Tutorials Roofs Youtube

Revit To Indesign Indesign Bim Diagram

Revit Architecture Roof By Extrusion Bimscape Com Imagens Revit

If the roof is extruded open an elevation view.
Revit cut extruded roof. In revit there are multiple ways to approach a modelling exercise. In this revit architecture tutorial i show you how to create an extruded roof form using the roof by extrusion tool. Create the walls and roof elements that make up the dormer. By using our dwg we find the slopes of two roof lines and their elevations for the rafter cut a simple two line.
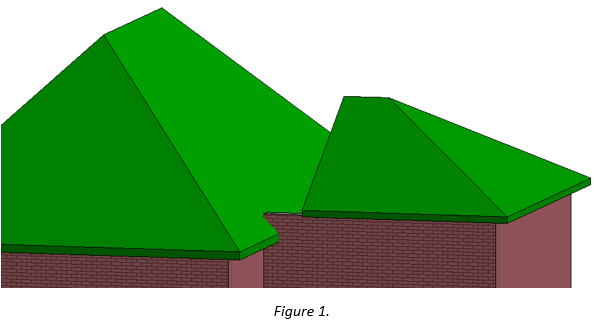
Open a plan view or an elevation view in which you can see the dormer roof and the attached walls. For the purposes of this tutorial i am going to use the following simple building. Architecture tab opening panel dormer opening highlight the main roof on the building model and click to select it. Revit makes both vertical and horizontal cuts in the roof.
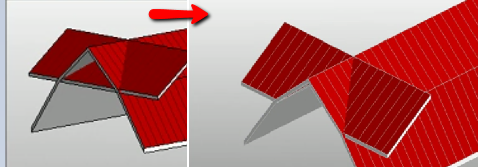
The bad thing about extruded roofs is the fact you can t follow along with the footprint of your building the good thing is we can do something about that the objective of this video is to go to the plan view we will then create a void where our walls jag in and out this is going to allow revit to cut the roof properly in plan to get started jump into your revit roofs. This is going to allow revit to cut the roof properly in plan. Family and parameters family category select roofs or whichever type requires a cut provide a name for the void select extrusion or alternative from forms draw profile for the extrusion and provide depth value properties for the extrusion identity data select void use cut geometry tool to cut the void. Dormer opening in a 3d view.
Modelling roofs is no different. After adding a dormer cut an opening for it through the roof. If the roof is extruded open an elevation view. In this video we explore an alternate method of creating a roof in revit.
We will delve into great detail on each later on but to start let s look at the standard roof by footprint workflow.

Solved Roof Is Drawn Higher Than Level Placed At Autodesk Community Revit Products

Revit Roof Basics 04 Intersect By Roof Join Cadclips Youtube

Solved Joining Roofs Higher Roof To Lower Roof Autodesk Community Revit Products

Solved Curved Mansard Roof Autodesk Community Revit Products

Revit Roof By Extrusion A How To Guide Youtube

Trim Wall Top With Ref Plane Autodesk Community Revit Products

Free Revit Download Wasco Skylights Square Pyramid Polycarbonate Panels Roof Lantern Skylight

10 Common Roof Shapes Modeld In Revit Tutorial Youtube

Pin On Revit
Revit Architecture 2020 Joining Roofs Cadline Community

Revit Tips Easy Farm Fence By Dynamo With Family Download Youtube Farm Fence Backyard Fences Fence Landscaping

Have You Ever Wanted To Add A Tolerance To A Revit Dimension

Curtain Wall Detail Bing Images Curtain Wall Detail Roof Detail Wall Section Detail

Pin By Gustavo A Delgado On Keyboard Surveying Engineering Autocad Engineering Design

Pin On Architectural Columns Collection

Solved Ceiling To Pitched Roof Junction Autodesk Community Revit Products

Solved Joining Vaulted Ceiling Component To Walls Autodesk Community Revit Products

Solved Roof Doesn T Meet Autodesk Community Revit Products
Https Encrypted Tbn0 Gstatic Com Images Q Tbn 3aand9gcrplqwcmnlb1mxoe8yuyripw7nz7c5mlpp8x10yvlu Usqp Cau

3 Complex Roof Shapes In Revit Youtube

Revit Mass Pattern Based Panel 1 Musica Movil Musicamoviles Com Arquitectura Moviles
Solved Questions On The Best Way To Construct The Following Roof Autodesk Community Revit Products

Separating Model And Detail Lines In Revit Design Reference Tips Model

Cadclip Revit 2014 Electrical Power Lighting Wiring And Circuits Diy Electrical Autocad House Wiring

Color Schemes In Reflected Ceiling Plans Ceiling Plan Color Schemes How To Plan

10 Revit Tutorial Roofs Part 2 Roof By Extrusion Youtube

Revit Roof Cleaning Up Overlapping Roofs Youtube

Revit Slab Cut By Void Family A How To Guide Youtube

Adding Dormer Window To A Sloping Roof Youtube

Revit Tips Spanish Roof Adaptive Insane Version Revit Tutorial Autocad Revit Roof

Revit Roof Workarounds Youtube

Https Encrypted Tbn0 Gstatic Com Images Q Tbn 3aand9gcsypmpackojihknncgufnonxuep0e5w Gu 8a Usqp Cau

Revit Basic Tutorial Conceptual Mass Extrusion Youtube

Revit Tips Join Roof Dormer Opening Youtube

How To Add Roof Truss Underneath Roof In Revit Youtube

Pin Di Beam

Bild Ergebnis Fur Vorhangfassade Kolumba Museum Bild Ergebnis Fur Kolumba Museum Vorhangfassade Archit Architecture Details Architecture Facade Design

Revit Roof Series Part 2 Roof By Extrusion Youtube

Vertical Ceiling Revit Youtube

The Best Way To Get 2d Architectural Plans Up And Running Is The Slab Extrude Command Importing The Plans As Rhino Architecture Rhino Tutorial Rhino Software

Revit Roof Tip 5 Activate Overhang On Picked Walls Roof Youtube

Pin On Dynamo Revit

