Revit Change Roof Slope From Arrow To Ratio
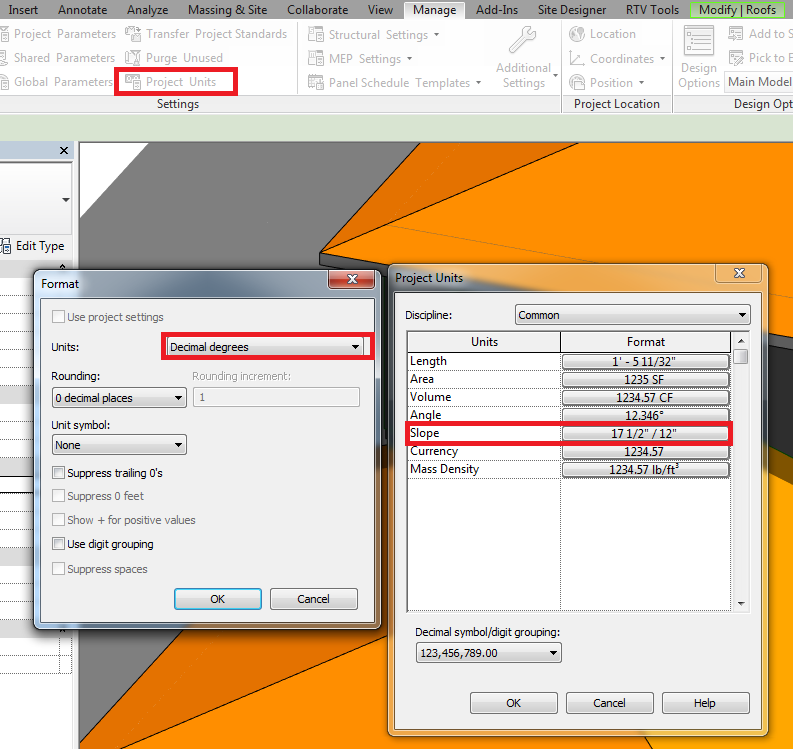
How To Set Up The Dimension For Roof Slope In Degree Revit Products Autodesk Knowledge Network

About Slope Arrows Revit Products 2019 Autodesk Knowledge Network

Add A Spot Slope Dimension Revit Products Autodesk Knowledge Network

Create A Roof Slope Using The Defines Slope Property Revit Products 2018 Autodesk Knowledge Network

Imagem Relacionada Simbolos Arquitetura Detalhamento Arquitetura Diagramas De Arquitetura

Create A Sloped Surface Using A Slope Arrow Revit Lt 2018 Autodesk Knowledge Network
The slope arrow must start on an existing sketch line.
Revit change roof slope from arrow to ratio. In the type selector select the type of spot slope to place. Optional change the following on the options bar. Use sloped edges or a slope arrow on a roof to create sloped roof elements. This video was recorded using revit 2012.
The following example shows a roof that you can create in revit lt using a slope arrow. Change the slope angle of the roof. Creating a roof with different eave heights you can create a roof with slope defined lines at different. When using a newer software release you may notice.
For more examples and tips see about slope arrows. Click once to specify its start point tail. Enter a value for. For instructions see creating a sloped surface using a slope arrow.
Enjoy the videos and music you love upload original content and share it all with friends family and the world on youtube. Use a slope arrow to define the slope. This video demonstrates the following. Use slope arrows to define slopes on a roof such as a 4 sided gable roof.
For instructions see creating a sloped surface using a slope arrow. You can use slope arrows to create slopes on a roof. Click annotate tabdimension panel spot slope. Draw the slope arrow in the drawing area.
Click modify create edit boundary draw tab slope arrow. Define a sloped edge to a sketch line. You can use slope arrows to create slopes on a roof. Sloped edges on a roof sketch line create a sloped roof.
Use slope arrows to define slopes on a roof such as a 4 sided gable roof.
Custom Slope Symbol

Toilet Block Detail Male Female Toilet Design Toilet Designs To Draw

News In Naviate Architecture Versions 2019 1 9 2020 1 3 Naviate Com

Use The Slope Editor Revit Products 2019 Autodesk Knowledge Network

Create A Sloped Ceiling Revit Products 2018 Autodesk Knowledge Network

Revit Custom Ceiling Grids Micrographics

How To Calculate Slopes And Gradients First In Architecture

Luminaires Lamps

Cfd Grid

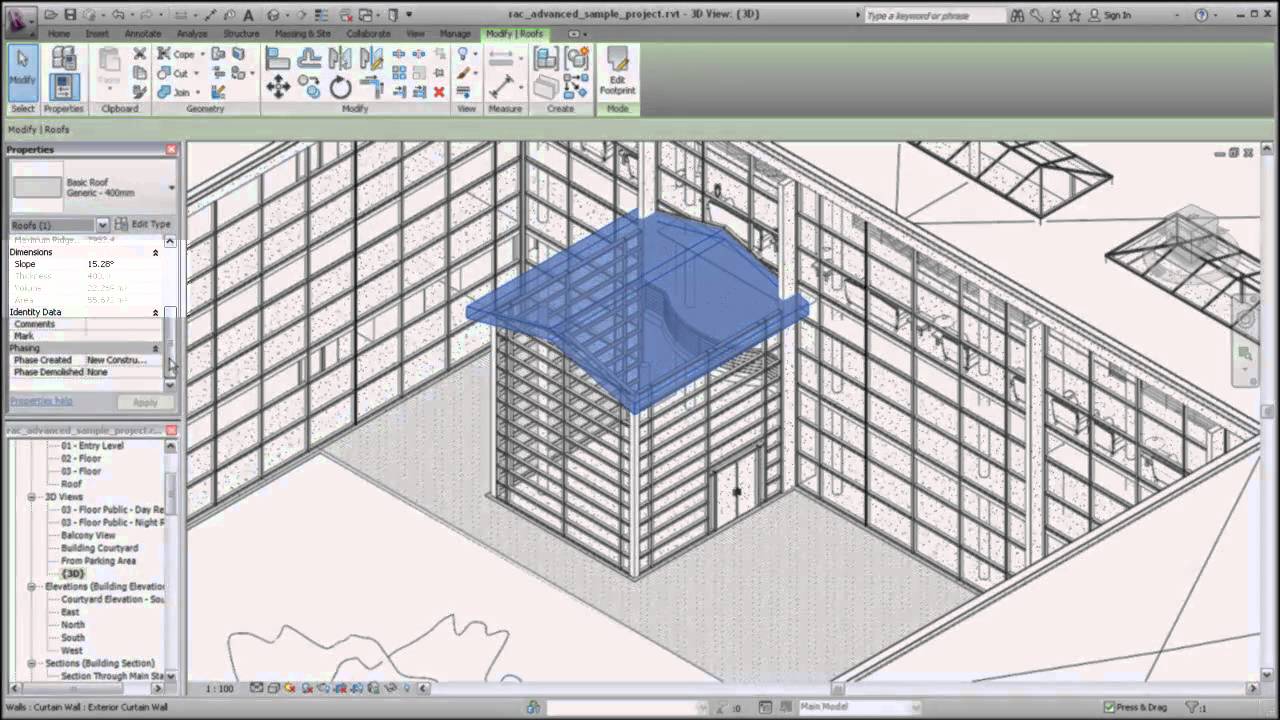
Revit Roof Tip 3 Modify Properties To Adjust Roof Slope Youtube
Https D1ozhi4p59900 Cloudfront Net Files Urn Adsk Content Library 78756fcf E6f3 4184 Abdd 04afc0337a02 Classhandoutas323494davidscohn Pdf Expires 1609459199 Signature Pm 6fme8nvf5oanfy4ecybbfooww3panrhpktj6egtflmgbtwyczhjyv2zirkw7swiotxwfezvhc7bybeeeuqvqsv Bvyyblo1pv00yaemr7vv1c3iolfkgdhhf0coc95u1vpqu4lsdokzfbs25cjohk Xgo8ro1a9cvsgmo4qkn3humv4bqjd26ynhgor6dekat6xpvclh9hw5qgpaqhoyslaia4ne 1dodlgy1vv0xnewep7cvtcaraumg88txcfuooardrd47qoeyo Dj1t0dgce2attyq9za0iwqofzioa0ngzzimd5eztudajeazurroyyzib4xwmwhqmnb9g Key Pair Id Apkaia22nyyfu6jzr5za

Tekla Structural Designer 2019 Service Pack 1 Tekla Structural Designer User Assistance

Floor With Slope And Variable Thickness Autodesk Community Revit Products
Https Www Wbdg Org Ffc Dod Cos Aw 078 24 28 March 2020 Pdf

Calculating Slopes And Elevations On The Fly In Civil 3d Youtube
Autodesk Revit Architecture Creating A Sloped Roof Youtube

Computer Aided Design Cad Competition Eg1003 Lab Manual
Https Static Sdcpublications Com Pdfsample 978 1 63057 254 9 4 Pdf
Https Encrypted Tbn0 Gstatic Com Images Q Tbn 3aand9gctnxxa4zp Zbjoh Fmlddyoj Trdlqbvg8mn1xirxjgbcatwdca Usqp Cau

Figure 5 6 From Building Information Modelling Bim Aided Waste Minimisation Framework Semantic Scholar

Create A Sloped Floor Revit Lt 2018 Autodesk Knowledge Network

Cantilever Concrete Beam Reinforcement Detail With Adjucent Continuous Beam Reinforced Concrete Concrete Retaining Walls Concrete

Understanding Scales And Scale Drawings First In Architecture
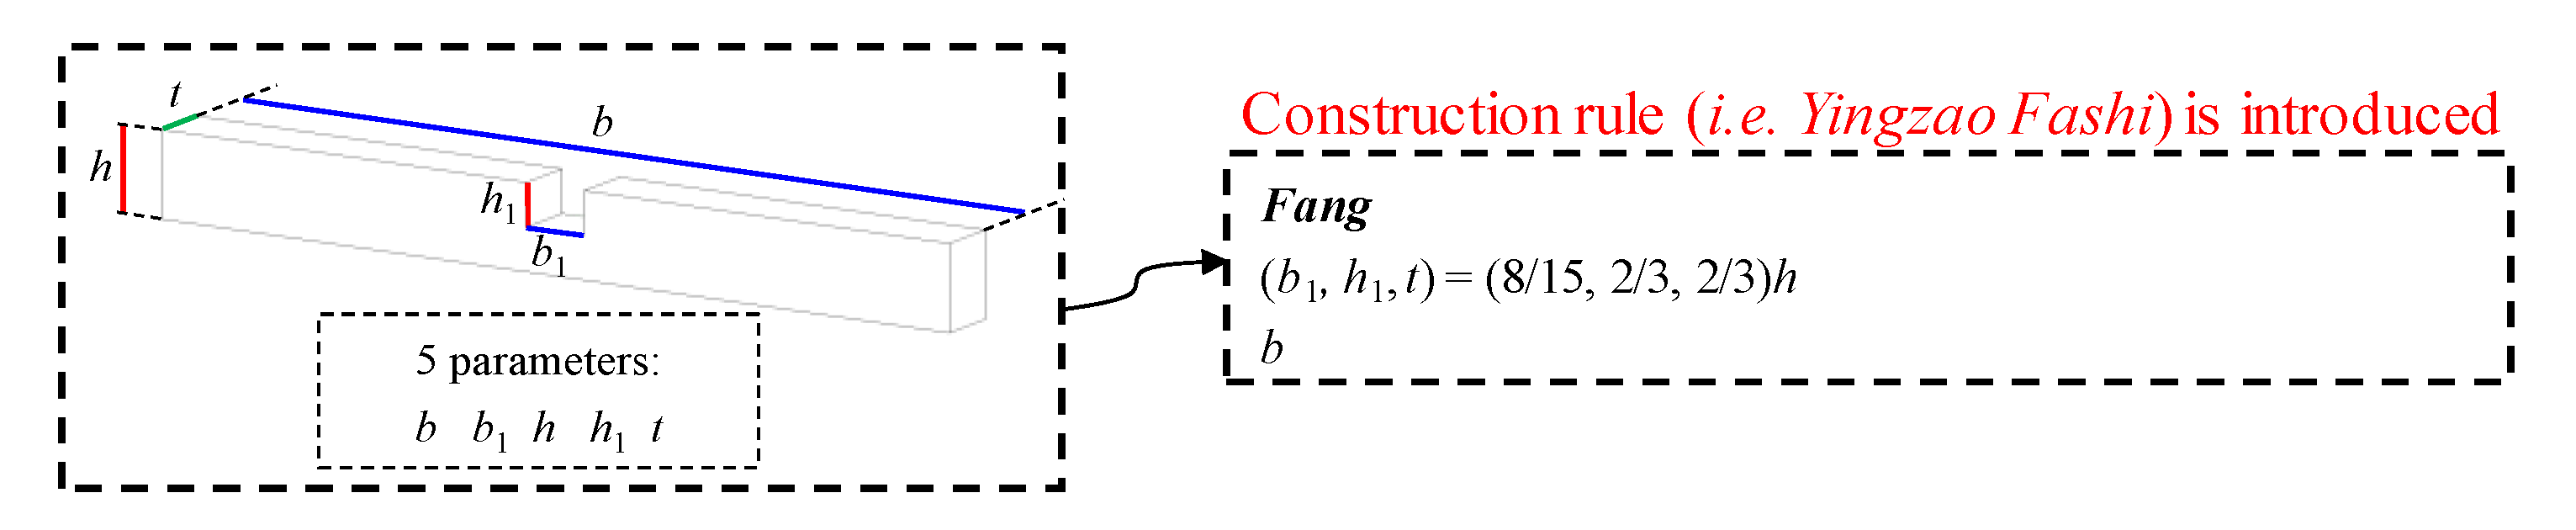
Ijgi Free Full Text Development And Application Of An Intelligent Modeling Method For Ancient Wooden Architecture Html

Sustainability December 1 2019 Browse Articles

Tekla Structural Designer 2019i Release Notes Tekla Structural Designer User Assistance

Customizable Ramps In Revit Youtube
Http Eeembedded Eu Wp Content Uploads 2017 09 20170911 Eee D9 4 Final Pdf

Dependency Graph Corresponding To Example No 2 A And Its Matrix Download Scientific Diagram

Integrated Parametric Multi Level Information And Numerical Modelling Of Mechanised Tunnelling Projects Sciencedirect

Video In Enscape Enscape
Kbxyvl Ymbjsam
Https Digitalcommons Wpi Edu Cgi Viewcontent Cgi Article 8333 Context Mqp All

1 3 Hot Water Boilers

Parapet Wikipedia
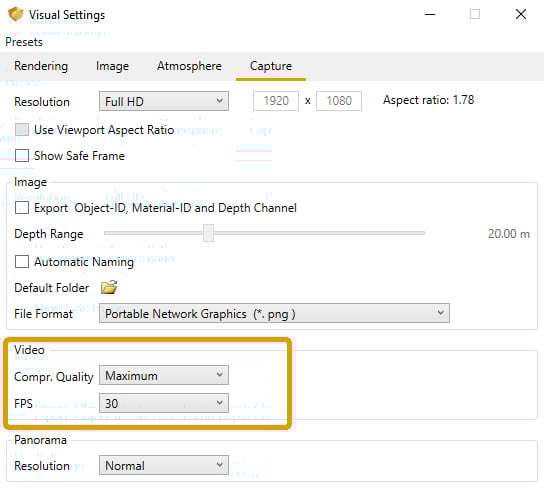
How To Create A Video In Enscape

Svcjy7g Vwdd7m

How To Incorporate Bimx Into Your Business Over Your Lunch Hour Updated Bim6x

Real Time Solar Exposure Simulation In Complex Cities Munoz Pandiella 2017 Computer Graphics Forum Wiley Online Library
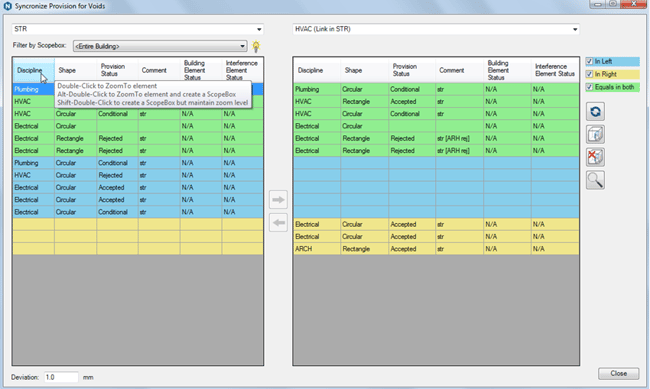
Provision For Voids Coordinate Openings For Mep Service Across Disciplines
Https Www Bricsys Com Static Files Bim Training V20 Pdf