Revit Adjust Roof To Sloping Walls

How To Create A Thatch Roof In Revit Micrographics Thatched Roof Thatch Roof

Revit Tutorial Constant Slope Rigging Family Rigid Insulation Therevitkid Com Tutorials Tips Products And Revit Tutorial Rigid Insulation Tutorial

Solved Roof Wall Join One Side Roof Misses Autodesk Community Revit Products

Autodesk Revit Tutorials 11 Attaching Walls To The Roof Autodesk Revit Revit Tutorial Revit Architecture

Autodesk Revit Tutorials 14 Adding A Sloped Floor Autodesk Revit Revit Tutorial Autodesk

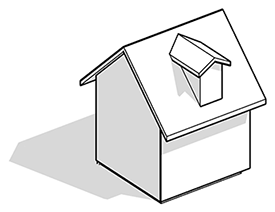
Several Residential Commercial Buildings As Well As Other Wood Framed Roofs Contain Clipped Gable Ends Also Know Building Information Modeling Roof Gable Roof
Draw the arrow then click it and change the properties to select the right levels and offsets.
Revit adjust roof to sloping walls. Select each boundary line and set the value in properties or in option bar. Define wall as a category 3. Use pick walls if you want the roof to automatically adjust when walls are moved. Define path confirm path 5.
You can set an overhang on roofs created with pick walls. 5 activate overhang on picked walls roofs. For example a roof with a slope of 4 inches of fall to 12 inches of run will require a stud wall that is 2 feet tall if the roof surface is 6 feet deep. Edit profile of curved wall in revit void cut method as you can see below we have a curved retaining wall which is stepped at the top but we would like it to have a smooth slope.
Http pbl stanford edu how to attach walls to roof objects in revit. To create a slope for an odd shaped roof like the one below use slope arrow. In sketch mode select a roof boundary line that defines slope indicated by. By applying the defines slope property to lines of a roof boundary you can create different roof types including flat roofs gable roofs and hip roofs.
The height of the wall is proportional to the roof s determined ratio of fall to run. Steps in the video. This create an uni directional slope parallel to the arrow. 7 use slope arrow for odd shaped roof.
Define a profile by sketch confirm the profile 6. Anchor the wall to the existing roof deck. To specify roof pitch select a slope defining boundary line click the numeric slope definition. Go back into your roof plan and draw another smaller roof this time the defines roof slope the little triangles is set on the left and right lines.
There are a few different ways to create a sloped profile of a curved wall in revit but here are two of my favourites.

Https Encrypted Tbn0 Gstatic Com Images Q Tbn 3aand9gcqdhfa1qxay7d0gldcaebjrhaab5v Ikcctva Usqp Cau

Webinar 2 Creating Masses In Revit Youtube Archdesignlabs Revit Tutorial Autodesk Revit Mass
9 Tips To Understand Revit Roofs Revit Pure

How To Model Roof Construction In Revit Roof Construction Revit Tutorial Architecture Building Design

Pin On Revit Architecture Tutorials

Revit Roof Basics 10 Slope Arrow Cadclips Youtube

Revit Tutorials Roofs Youtube

5 Revit House Plan Tutorial In 2020 House Plans Revit Architecture House

Sloped Railings Fences Using Adaptive Components In Revit Revit Tutorial Components Fence

Revit Architecture Roof By Footprint Bimscape Roofing Fibreglass Roof Roof Design

Revit Tips Roof Tile Generator By Dynamo Roofing Diy Roof Tiles Revit Tutorial

Revit Roof Slope Arrow

Pin By Simon Hayes On Revit In 2020 Revit Architecture Autodesk Revit Architecture
Revit Roof Tip 8 Set Variable Material For Sloped Insulation Youtube

Rafter Framing W Autodesk Revit Extensions Revit Architecture Autodesk Revit Revit Tutorial

Revit Content Advanced Bi Fold Door Revit Family Bifold Doors Revit Family Fold

How To Do Wall Tiling In Revit Using The Paint Command Wall Tiles Revit Tutorial Wall

Solved Attaching Wall To A Roof Problem Autodesk Community Revit Products
Https Encrypted Tbn0 Gstatic Com Images Q Tbn 3aand9gcqt Jag1pa Hofhz 59fqg8i0feamtfelr0xlmsrdq6chiqvxbg Usqp Cau

Solved Roof Overhang Option Not Available For Some Roofs Autodesk Community Revit Products

There Are Different Methods In Revit For Creating Roofs The Easiest One Is The Footprint Roof A Footpri Building Information Modeling Revit Architecture Roof
Revitcity Com Difficulty With Wall And Roof Ends

Revit Roof Tip 5 Activate Overhang On Picked Walls Roof Youtube

Pin On Revit

Render In Cloud Revit By Me Revit Texturas Iluminacao

Tutorial Edit Section Heads And Tails Bement Tutorial Object

Revit Tutorials How To Orient To Revit True North Vs Revit Project North Youtube Revit Tutorial Building Information Modeling Autodesk Revit

Proper Way To Save The Revit Model For Consultants Use Learning Revit Learn Revit Design Design Program

Revit Tips Brick Pattern Wall By Dynamo Revit Tutorial Brick Patterns Building Information Modeling

White Aluminium Panels Give A Ridged Texture To The Walls And Rooftops Of These Homes Near Belgium S Co Architecture Roof Architecture Residential Architecture

Revit Tips Manipulating Curved Wall With Unfolding Youtube Revit Tutorial Wall Civil Engineering

Youtube View Projection Modes Revit Architecture Revit Tutorial Architectural Section

Revitcity Com Image Gallery Revit Family Outdoor Structures Gallery

8 Tips To Create Sloped Roofs In Revit Roof Shapes Roofing Roof

Tutorial Creating And Controlling General Notes In Revit Revit Tutorial Tutorial Paris France

Ribbon Roof Epilogue Telas

16 Capital Glass Roofing Lobby Ideas Roof Repair Roof Architecture Revit Tutorial

Five Minutes Of Roof Sloping Roof Slopes

Model Your Revit Designs In The Context Of The Real World In This Webinar Lumion Expert Chris Welton Shows H Video Revit Tutorial Revit Architecture Architecture

Bsi 050 Parapets Where Roofs Meet Walls Parapet Flat Roof Roof Detail

Revit Roof Basics 04 Intersect By Roof Join Cadclips Youtube

Revit 2 1 Mass Modelling Intro Revit Tutorial Intro Youtube Intro

